Monday, December 28, 2009

Torte Tribulations


Dobos Torte - 36 layers with chocolate buttercream frosting between each layer and dark chocolate glaze.
Remember the discussion about fake buttercream a couple of posts ago? Well, today I was forced into bad buttercream. It broke my heart to put a whole pound of butter in with 3 cups of confectioner's sugar. I knew what the outcome would be-yet my hand was forced.

How could this happen??? Let me tell you how...

It started simply enough-- Me saying "let's make the Dobos Torte". We found the recipe. But it wasn't one of the old ones. It was typed and still readable. The others are worn with time. My first clue.
Then I read the recipe. Shock came over me. This was FAKE buttercream. This could not possibly be my mother's recipe that I had salivated over each time she made this cake. This could not be what I remembered and longed for. I looked at it again-held it in my hands-turning it-thinking of the consequences. Then I spoke slowly and gently: "We can improve this recipe". HOW??!! my incredulous mother intoned. "By improving the frosting". 'Absolutely NOT! " she replied. "This is how I have made it for 50 years!".

And with that-I was forced into bad frosting. Could I be wrong? Could this recipe that sounded exactly like the recipe on the confectioner's sugar box that I hate the taste of really be the frosting for the Dobos Tort? Mais Non. It was the frosting on the confectioner's sugar box and yet, no amount of tasting it in all its horribleness can convince my mother of her error. She is convinced it is the right recipe. I know better. I know exactly what happened.
Back in the 1970's and 80's we had been in this country long enough that our taste buds were flattened by the incredible dearth of good food in America. It had taken 20 years-but it had happened. Mom grew tired of educating palates that were incapable of discerning the real thing from something in a box. And so, instead of spending hours making it right-she saw the recipe on the confectioner's sugar box and thought "well, when in America". And there you have it. that awful frosting recipe was made part of a fabulous traditionally french cake known for its distinctive layers and deep dark chocolate flavors--reduced to a pile of- of- of -confectioner's sugar lard!! oh god-how awful.
And now-so many years have passed without making the cake. Our taste buds are restored and it is an unbearable blasphemy to pair the 36 delicate paper thin layers of this cake with-- CRAP! And what is worse? I spent hours making that tonight because the cake itself is a mastery in design and patience.

My sister kept saying "make it over! make it over!" but no-this was the experiment. I made it to make the cake and see the process. I know how to make the frosting with one hand tied behind my back and blindfolded. So what would it prove to make the cake over again? We will serve it as is-the good news is-I won't be eating any of it! No temptation on my part with this one. YUCK that frosting. Who can eat that stuff??
My mother still refuses to believe she sold out. She thinks this is the cake she made in Paris. Although if she thinks about it-she will realize no one in Paris would eat this. Perhaps the dog. But even they did not want the frosting. They begged for the cake and got plenty of scraps, and they had begged for the real buttercream when we made the Buche--getting little licks of it here and there--but this they turned their nose up at. Smart dogs!
So structurally the cake looks correct-but the taste? Well how about "just like it came from a bakery". Yucky.

Moral of the story? Don't let you mother get to age 77 before pulling family recipes. It's not easy to remember things at that age( heck-it's not easy to remember what I had for breaksfast now!). I knew I was doomed about two years ago when I said I was making mashed potatoes for dinner and she directed me to the pantry for FAKE mashed potatoes. This from a woman who would have no processed foods in her house. Who thought McDonald's was for farm animals and who definitely knew her buttercream from her bakerycreams. And she still does-but now she is being stubborn.

I think tomorrow when we eat the cake she will say "you're right-this is the wrong frosting". let's hope for that-or I will have to start worrying....
UPDATE!!! We served the cake tonight and Mom wouldn't eat it! why? Because the frosting was bad! Although she is not totally giving in that the wrong frosting is with the recipe. Instead she decided I must have made it wrong. (how can you make three ingredients slapped together-wrong??) UGH! But at least her taste buds are intact! :).
I go home tomorrow morning. I've made about five holiday dinners, 2 batches of orange rolls, and a Buche. And loved every minute of it. Of course I ate way more than humanly possible! good thing I will be home for the next ten days. Need to recover from Food hangover.

Saturday, December 26, 2009

Santa and the Witch


Being a story teller from way back, I find it very hard to entertain little children and not tell some sort of story. However, I am never really sure how they are going to end. This of course is not exactly comforting to the parents. "then all the little children were eaten by the monster". Not a good ending...

This year, we made a Gingerbread house for Christmas with the very able assistance of my grand niece and Nephew who are 3 and 4. As you can see from the pictures-this was a true work of art! If you have ever worked with the icing from those kits you know it is like cement (as a matter of fact--that is what holds the house together-so it is cement). And the pieces of the house could seriously be used as self defense devices if you ever get robbed at Christmas. Just grab the roof off the house and fling it Frisbee style at the assailant and I guarantee he will be decapitated.

But getting back to Santa and the witch. During the making of the house, I had to keep them entertained while I outlined as best as possible, all the parts of the house. So I began telling them not to touch the house because a wicked witch lived in side and she would come out and eat them. They had to let me put the house together and seal it up so the witch could not get out. I then instructed them that the gingerbread men (that they desperately wanted to eat) were her guards and so they had to be very careful of them-no eating as they could be very mean.

Along about now my nephew says "aunt Judy-this better be going somewhere good". I must tell you--this is the first time I realized I had better have some sort of plan. But--Too late! we'd have to see where it went. Chloe was quite certain she could take the witch on herself and felt if I just gave her a chance to eat the house she would show me her witch superiority. so I had to make the witch REALLY nasty. More bad news for mom and dad.

Finally, the house was outlined and it was time to put all the doo dads on. And this is when we wrapped up the story.

Seems Santa comes at night and eats the gingerbread guards and goes in through the chimney and gets the witch out of the house so that every one is safe. But until then--no touching the house. So that is how the legend of Santa and the witch was born. Two fairy tales sort of melded into one Just like the TV shows that borrow characters from other shows to extend their plots. Hollywood has nothing on me. :).
Mom and dad took the gingerbread men from the house and left some crumbs. The next morning the children ran to the house to see the gingerbread men eaten-and of course-the witch was gone--thanks to Santa who once again saves the day!

The children thought the house was gorgeous and they had a great time putting it together so that is all that really matters. Thought you would enjoy a little Diva divergence...

Friday, December 25, 2009

Orange Rolls Trump Love


Well, you know what they say about true love-it conquers all. But apparently it is not as strong as the inside of an orange roll. as my nephew munched on a roll before dinner his wife asked him for a little piece. He hesitate, was reluctant, then said yes. Just as she was taking a bite he could not take it any longer and said "but you can't have the middle!" So there we have it. I did not take pictures of them-regrettably, but they were big and beautiful and lusciously delicious. My mother ate three of them as they came out of the oven and I think every one had at least two at dinner. I made 36 of them and only a few remained. Their smell fills the house and they just look so beautiful you can't help but pop them in your mouth.

The dough is soft and eggy and the filling is orange and sugar and butter. How can you go wrong.

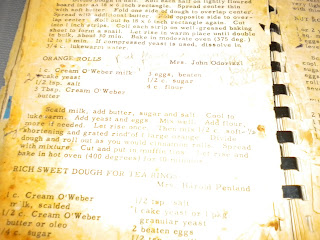
Here is a picutre of the book this recipe came from. This book is 57 years old and as you can see it has been through a lot of baking in its day! It's the ladies circle of Cheyenne Wyoming that put this book out. My mother and i love the recipes from it and use it quite often. You can bet this baby is out of print circulation.

This weekend I will be conducting a "all things Yeast class". Friday and Saturday. I will send an email to those on my list, but if you would like to be added to the list please email me at
innerdd@hotmail.com. I will be sending the flyer out tomorrow. We will feature the orange rolls, the nut roll, Challah bread with Bosc pears and time permitting-Baba au Rum.

Ta Dah-This Year's Buche


Notable items about the Buche. First, Notice the use of the buttercream to make the "bark". Then notice the cut out piece of cake that looks like a bump on the log. Also, there are two types of frosting. The interior is coffee and the exterior is Mocha. You could do Mocha and Chocolate as well. But the two types of frostings give the distinctive difference between the rings of the wood and the bark.
And finally, notice the lightness of the cake. Remember-this is a cake that rises from only the treatment of the eggs-no leavening. This is quite a feat. This is a cake that will not always turn out right-even for an experienced baker. The slightest thing and poof-the eggs fall. But, knowing all the tricks makes it a 90% probability and the cake is so ethereal in texture that it is worth the effort.
I did not publish the recipe for either the Genoise cake or the Buttercream frosting because attempting them without instruction would probably lead to disappointment.
Anyone wishing to to part of a master cake making class involving the Buche and the frosting (which can be used at Christmas-or other times of the year in different configurations) email me at innerdd@hotmail.com and I will see if there is enough interest for a class. I understand these are extremely expensive in bake shops and they are not the real thing. Imagine the impression you would make next holiday bringing this out!
I hope you and yours had a lovely holiday. :).

What is Real Buttercream Frosting?


So many bakeries advertise buttercream frosting on their cakes. In actuality, 90% of the time it is a lard based sugar concoction that they whip into a frenzy and slather in hideous quantities on their pathetic cakes. Not a great combination and NOT a buttercream frosting!

Even in very good pastry shops-most of the time their buttercream frosting is made with confectioner's sugar and butter and lard, but is not a true buttercream.

In order for a frosting to be a true buttercream-it must be cooked. COOKED??? you think. Yes, cooked. And here is how.

First you decide what flavor you want. If you want chocolate you can proceed with step one. If you want Mocha, you must first mix instant coffee and water and then add the other ingredients.

The next step is to add sugar and water to a pan (with or without the coffee mixture-your preference) and set it on a medium high stove. You need a candy thermometer for this part. the liquid has to come to 238. that is soft ball stage. that is the point where a little of the syrup dropped in water will form a soft ball. Hard ball stage is when it forms a had ball-that is like a brittle. Soft ball allows the syrup to be pliable and pourable and mixable.

While that is coming to softball stage you need to put your eggs (warmed previously in warm water) in the mixer and beat then till they turn a nice lemon color. Once the syrup is at softball you remove it from the heat and begin incorporating it in to the eggs (mixer running). This is a very delicate process. The eggs cannot cook and the syrup is very hot. so in order not to get scrambled eggs you must add very slowly in the beginning. There will be syrup all over the bowl in side-don't worry- you can get this a little later. In the meantime, continue to add slowly to eggs-faster as the eggs become tempered (meaning they have accepted the hot liquid, are warm and now will not cook-they have taken in the syrup to form a completely different consistency).

Scrape down the bowl at this point and incorporate all the syrup that has accumulated on the inside of the bowl (you don't have to be too fussy about this-but try to get most of it).

Now comes the fun part (and you thought the other part was fun!).

You are going to add softened butter to this mixture. But since this is a very warm mixture-guess what happens to the butter if the frosting is not cooled correctly? that's right-it melts and your frosting is now oily and messy. But you can't wait or the syrup/egg mixture will not be the right consistency. SO what is a baker to do? well-you add ice of course. SO what you have to do is get a bowl of ice under the frosting bowl. I use the big mixing bowl for this as i am using the small mixing bowl for the frosting. You place the frosting bowl in the big bowl, add the ice and return everything to the beaters. now you SLOWLY start to add the butter-making sure it is incorporating -- not remaining in solid lumps, but not melting either. After all the butter is added you can now again decide on a flavor, you can add vanilla, or rum or chocolate or what ever suits your fancy (maybe even orange extract and orange rind or lemon extract and lemon rind). For Mocha, add unsweetened chocolate to the coffee frosting.

And THAT is a real buttercream frosting. Now you know why you rarely see it in a bake shop and certainly don't find it on any commercial cakes!

Thursday, December 24, 2009

More Buche Photography


the first picture is the slow process of finding little bits of flour and making sure they are delicately incorporated, the second picture is the drizzle of butter added to the batter and folded so gently that the eggs are barely disturbed. The final picture is the Buche in a towel.
sorry I didn't get more pictures from oven to towel, but you have to work very quickly when this bad boy comes out of the oven. You have to invert the cake, sprinkle a towel with superfine sugar, flip the cake on top the towel, peel the parchment, sprinkle it with more superfine sugar and the roll it lengthwise very quickly. If you don't work quickly enough the cake will crack when you roll it. which is the whole purpose of rolling it--You are giving it "memory" to be later rolled with icing in the middle.
Part two: the Frosting. Tomorrow.

Bunch of Buche


We started the Buche at around 12:00. We finished the Buche at 5:00pm. Now you should know that my mother and I are masters at this so that was two people, working well and quickly together.
The good news is, since my mom was here, I was able to take lots of pictures. although sometimes I thought she was going to kind a gun if I didn't stop taking pictures and do whatever time sensitive things was necessary. Because let's be clear-this is no ordinary cake.
I have taken pictures of many parts of it. First is her very worn and very awesome cookbook which I have told her if she goes before me-I expect that it will be willed to me. Unlike "mastering the art of French cooking" by Julia child, this book is for people who want to cook with all the complexity of the French chef. Great illustrations on things. Like how to carve a Saddle of Hare. I KNOW you have been wanting to know how to do that. Seriously, great cookbook on authentic french cooking done the way they do it-not edited for American capabilities or tastes. Things have changed since Julia Child wrote her book. We are able to get authentic ingredients and we crave authentic cuisine.
The title is "Modern French Culinary Art: by Henri-Paul Pellaprat. I'm not sure if it is still in print because I suspect not too many people are into the real art of French cooking. It's circa 1966.
At any rate, as you can see by the pictures, it is well worn, and like me, my mother makes notes. A cookbook is a study plan or a guide - not just something to look at. Although I must laugh, as I page through it-the bookmarks are of a variety of items. One is a report card for me from my junior year in college! Still in the envelope. Never straying form the its mark for the last 30 years.
So what makes this cake so difficult yet so delightful? well let's begin:
(I have to apologize, the pictures are in reverse order. I keep forgetting this blog puts the pictures in the opposite order that you request them. takes too long to download to do it again-just go from the bottom up).
First, the eggs MUST be warm. We put them in a hot water bath for about 15 minutes (in their shells). then we warmed the bowl with warm water, then we sat the warm bowl and the warmed eggs in a bath of hot water. You see in the pictures the eggs at the beginning and then the beautiful pale yellow fluffy eggs in the next picture. that is just eggs and sugar. Oh-the sugar is superfine so you have to put it in the blender first to make it very fine. You must also add the vanilla at the same time as the sugar. to wait till after will make the cake fall. (yes, 1 1/2 teaspoons of vanilla at the wrong time will make the cake fail).
This is all the leavening in the cake. No baking powder, no baking soda-nothing else. Just the warm eggs beat until they quadruple in volume. Once you have the eggs and sugar to the right volume you slowly add the flour (sifted BEFORE measuring-not the recipe says "1 cup of sifted cake flour". If it said "1 cup of cake flour sifted" then you would have measured before sifting. but it says sifted cake flour, so you measure AFTER sifting).
OK, now we have the flour in -by tablespoons. Some of it will remain--that's OK. You don't beat too much. You take the mixing bowl from the mixer and continue to mix the flour in by hand VERY GENTLY as the eggs can fall at any moment with any slightly rough handling. so you meticulously pick out all the little flour lumps that remain and disperse them in the batter and gently fold them.
Now you take melted butter that has been allowed to cool and settle. Being Very careful not to get any of the sediment, you take teaspoonfuls of the butter and drizzle it on the batter and ever so gently fold it in. This is the most tedious but crucial part. Very slowly, very little at a time.
Once that is complete, you are ready for the pan. A parchment lined jelly roll pan-commercial grade (thick).
You pour it in the pan and cook it in a moderate oven for 35 minutes. Don't open the door to see if it is done. You have to look at it through the oven window. If you think its done-ever so slowly open the oven door, touch the top-if it bounces back a little, it's done.
Upon taking it out of the oven, have a towel ready. Flip the cake and strip the parchment paper and place the cake on the towel. Sprinkle the cake with superfine sugar and roll it length wise in the towel.
Let it sit there while you make the frosting. that's the next post. Are you exhausted yet??? :). I am!
This blog only allows me five pictures per post-so the rest of the pictures for making the Buche are in the next posting. Tomorrow we will discuss the frosting. You really didn't think that would be easy after all this for the cake did you?? Serioulsy-it's french! It can't be easy.

AHHHHH! the dreaded Buche!

Oh she was cleaver this year-said she didn't feel good-went back to bed, sent me to run errands. And then, she snuck it in as she was getting up. I want to make the Buche now. WHAT?? I thought you just told me you didn't feel well?? Man, tradition is a really powerful thing isn't it. SO for mom-we make the Buche.

I think I will document it for the blog.
Stay tuned....

Like Person/ Like Dog


You know how they say that people begin to resemble their dogs (or is it the other way around-I guess it depends on which one is uglier). Well I also think that they develop the same eating habits.

My mother's dog Coco eats the inside of her croissant every morning (remember my mother is french). He also begs for butter-big pieces of it. And he really has no desire to eat much of anything else-perhaps a nice fillet Mignon every once in a while. He weighs all of five pounds so he's not a big eater-just very french.
The Italians say that the french have an immature palate because they use butter instead of Olive oil. I say great! who wants to grow up anyway???
Excuse me while Coco and I go eat some butter. :).

Wednesday, December 23, 2009

More cookies! Lime -nut coconut buttons


These little gems surprise the taste buds as they seem like an ordinary wedding cookie --then they release a burst of lime followed by a slow and vague taste of coconut. They seem to leave everyone who tries them with a "wow!"-these are really great! feeling.
In the picture they are the white round ones that look like an Italian wedding cookie. Go ahead-mess with people's brains-throw them a curve ball with a deceiving little cookie. :).
They are pretty simple-Just don't roll them too large-make the balls as small as the melting moments (see pictures in melting moment recipe).
Lime Nut buttons

1 cup flour
1/4 teaspoon salt
1/2 cup confectioner's sugar
1/3 cup coarsely chopped pecans
1/4 cup sweetened flaked/shredded coconut
1/2 cup unsalted butter-softened
2 teaspoons finely grated lime zest
1 teaspoon vanilla extract
1/2 cup confectioner's sugar for coating
In Food processor combine 1/2 cup confectioner's sugar, pecans, coconut and salt. Process until the pecans are finely ground.

In a mixer, beat the butter until creamy.

add the pecan mixture and mix till well blended. add lime zest and vanilla. scrap bowl down often to make sure things are really blended-make sure to get under the beaters when scraping.

Add the flour and beat till combined. Wrap dough in plastic wrap and refrigerate for 3 or more hours.
To bake:
heat oven to 350

Take about a teaspoon of dough and roll it between your palms-do not over work the dough!

Put the balls about 1 1/2" apart on an un-greased cookie sheet

Bake until the edges are barely brown (10-12 minutes)

Let cool on cookie sheet for about 5 minutes.

Put remaining confectioner's sugar in a ziploc bag. throw about 15 of the cookies in the bag at a time and toss around well to coat. remove cookies and allow them to continue to cool. continue to add cookies to the bag until you are done. you may need more confectioner's sugar-depending on how much they absorb.
For a really silky cookie-re coat them after about 15 minutes.

Makes about 50 very yummy cookies sure to illicit lots of ooh's and ah's.

Coupons save lives

OK-this has nothing to do with food. But I thought you would appreciate the story.

Got home from Vail on Sunday night (uneventfully even though there was 18" of new snow on the ground). Monday was errand day since I was leaving the next morning for Buffalo and then mom's in Charlotte.

Just finishing my errands around 4:30, heading home and decided to go to True Value to see if they had out door Christmas lights (since everyone else on the planet is sold out of them), I park on center St in West Roxbury-two blocks from my house. First attempt has me sticking out too far over the white line (snow). so I get back in the car and re park. this time I am in the white line.

Go to open the door and realize I am forgetting my $5 off coupon for True value, on the off chance that they actually have lights. So I grab it from the seat and go to open the door and just then, WHAM! this huge red pick up truck smashes into my bumper, grazes my car, takes off the mirror and slams in to the front wheel.

If I had not picked up that coupon on the seat, I would have been smashed to smithereens. SO that is how coupons save lives.

Car had to be towed out. Guy was drunk. he went in to the bar next to where i parked to get another cold one to calm his nerves after the accident. I'm freaking because my car is now sideways and sticking out in to the street. I am waiting for the tow truck watching cars get really close to me. I call the cops to help. They get there and say "oh you're fine, no one is going to hit you" ?????????????!!!!!!!!!!!!!!!!!!!!!!!!!!! someone just creamed me while I was parked in the white line, but now that I am sideways and my rear end is in the middle of the road I'll be fine??????????????? Unbelievable. So he left. America's finest at work....

I went home and fixed myself dinner. Wondering if my car was totalled and thinking about how I was almost killed. You just never know when or how your life can change in an instant. Mine didn't-but it certainly could have.

Stay safe this holiday season.

I'll be posting recipes throughout the week from Mom's.

"On the Blog again...good to be on the blog again..."


Sung to the tune of "on the road again"--which I have also been doing a lot of lately!


Just got to mom's this afternoon. Lots of food to be cooked. These are the biggest sweet potatoes I have ever seen in my life! and this isn't even TEXAS! check them out. I put a large bosc pear with them so you could judge the size.
So if you are on weight watchers and eat "a sweet potato". it's really no big deal right? Man, this thing is probably 1000 calories. Just huge.
We've already got dinner planned out for the next four days. that was the first topic of conversation on the way home from the airport.
However--and this is a big However--no mention of the dreaded Buche de Noel yet. Maybe this year I will get out of making it! Pictures of last years are above.
I'd rather make nut rolls-I am going to attempt to perfect the dough. it is a little too dry for me. I think more egg less butter will work. I'll keep you posted on that one.

Saturday, December 19, 2009

Tasty bites and tales of travels from Vail


We've been in Vail for 5 days and have eaten and drank enough for six people. Well ok-lets be honest-more drinking than eating. although we did discover that our hotel bar is apparently the hip spot in town so it makes it very easy to go downstairs-have amazing $5 tapas and $5 cocktails and then just stumble to the elevator.
Fabulous flavor combinations: Mussels in a broth with blue cheese melted in, short rib Arancini,
last night-three incredible meals at Sweet Basil. Note pictures of happy girls after good food and nice wine. Nothing makes a girl happier (well almost nothing) :).
A few more cocktails and then we move it outside for a little bear riding adventure with out new friends, It was zero degrees outside. BRRRRR.
Home on Sunday-tomorrow-weather permitting. snow storm predicted in Boston. Weather is gorgeous here.....ironic but true.

More on cookie texture science

How you like your cookies is purely individual. Some I like soft and chewy, others crumbly and butter. So how do you manipulate your cookies (amd I mean maniputlation in the nicest sense of the word)

By adjusting key ingredients, you can change the texture of any cookie recipe.
If you want chewy cookies, add melted butter. Butter is 20 percent water. Melting helps water in butter mix with flour to form gluten.
If you want thin, candy-like cookies, add more sugar. Sugar becomes fluid in the oven and helps cookies spread.
If you want cakey cookies, add more eggs. Yolks make cookies rich, and whites cause cookies to puff and dry out.
If you want an open, coarse crumb and craggy top, add baking soda. Baking soda reacts quickly with acidic ingredients (such as brown sugar) to create lots of gas bubbles.
If you want a fine, tight crumb and smooth top, add baking powder. Baking powder works slowly and allows for an even rise.

And THAT is the scoop on cookie deviations.

Tuesday, December 15, 2009

creative cooking

Here I am in Vail for the week. We missed our flight here (6am flight) and ended up going to Denver via Chicago and then driving three hours to Vail in the snow. Today-great ski day. 35 degrees-beautiful crystal clear blue skies perfect snow-what else could you ask for?

How about the hot tub and Champagne! After that we are totally exhausted. But not too exhausted to cook.

In the oven is a big oven roaster chicken with garlic pressed under the skin and a cut up orange in the well seasoned cavity. On the stove, the giblets for a little broth mixed with the orange juice from the oranges to baste the chicken with shortly. Hope it tastes good!

We were way too exhausted to go out to eat. besides-we are saving ourselves for the wed-sat activities on the mountain! happy hour is sure to be more fun as the week goes on. Well at least this is what we tell ourselves. in reality, we'll probably be on the couch tomorrow night too! :).

Oh and the story wouldn't be complete without telling you about He ski lift down the mountain. It was definitely an E-ride. Of course the most exciting part was that we took the lift down at 4:00 and about halfway down, in the middle of nowhere, the lift stops. All we could think was that they forgot we were on the lift and we were going to be stuck there for the night. It was really a scary experience. But after a couple of minutes the lift "ride" started again. Tomorrow we take the cat walk down!

I pre-appologize for typos. Can barely keep my eyes open! Let's hope I don't forget that chicken in the over,,,,,

jb

dark chocolate Rugelach


OK-I'm not going to lie-these are a big pain in the neck. Every year I make them and think-"what is wrong with me??? why would I do this???". Then I taste them and forget the pain of making them. I swear its like childbirth. If everyone remembered the pain there would be no children! but as humans-we forget the pain of the process and only focus on the end result.


So have fun with these-they are worth the trouble-if you are only making one tray of them. I would not suggest doing multiples as I do. Unless you are looking for a real arm workout. this will definitely get your biceps in shape. I recommend a very heavy rolling pin. Mine weighs about 5 lbs.


Bittersweet chocolate Rugelach:

1 cup walnuts

3/4 cup cold unsalted butter cut into 1/2" pieces, Plus three tablespoons melted for filling

8 Oz cream cheese

2 cups flour

1/2 teaspoon salt

6 oz chopped bittersweet chocolate

1/2 cup sugar

1 tablespoon ground cinnamon

3/4 cup currants

grated rind of 1 orange

3 tablespoons light corn syrup

1 large egg yolk

3 tablespoons fine sanding sugar*


Heat oven to 350.

spread walnuts on a baking sheet and toast till golden and fragrant-about 10 minutes. let cool


place 1 1/2 sticks butter and the cream cheese in a mixing bowl of an electric mixer fitted with a paddle attachment. Mix on low speed until the cream cheese is broken down but butter is still chunky. On low speed, add flour and salt. mix until crumbly and just beginning to hold together, about 20 seconds. there should be still some small pieces of butter visible. Divide dough into two parts. form a flat disk with the dough and wrap in plastic wrap. transfer to the fridge and chill for five hours or overnight.


Place the chocolate in the bowl of a food processor and process until the chocolate is very finely chopped. Transfer to a large bowl. Finely chop toasted walnuts by hand and add to the bowl. Add sugar, cinnamon,currants,orange rind, corn syrup, and melted butter. Combine well.


Line a 9x13 in baking pan with parchment paper.


Place one disk of dough on a 9x13" piece of wax paper. roll the dough into a rectangle the size of the baking pan. Line the baking pan with the rolled out dough (place on top of the parchment that you Had lined the pan with). Spread dough evenly with chocolate mixture. Roll the remaining disk of dough the same as the base layer. Place it on top of the chocolate mixture-making sure it goes very close to the edges of the mixture.


Put the egg yolk in a little bowl and whisk in a little water. Brush the egg onto the dough with a pastry brush.


Sprinkle with the sanding sugar. Bake in 350 oven till golden-about 35 minutes.

*to get sanding sugar-put three tablespoons of sugar in a food processor and process til very fine.


Just some notes:

Make sure not to put the egg yolk in the chocolate mixutre. It is for brushing on the top of the pastry.


You can do it the way they tell you-or, do it as I do it which is to put the dough immediately between two sheets of wax paper and roll it out to the desired size BEFORE refrigerating it. Then I refrigerate it for the 5 hours or overnight and put the slab in the pan and then on top of the chocolate mixture. If you do it the way they tell you-the dough is VERY hard to roll out. I find it easier to roll it first then put it in the fridge. The wax paper will get stuck in the dough as you roll it-just make sure to keep pulling it off and resetting it (top and bottom) so that when you harden the dough in the fridge, the wax paper is not stuck in an crevices.


Saturday, December 12, 2009

Parsnips


I pulled my parsnips out of the ground today (that is them in the picutre). It got really cold here very quickly. They smelled so good as I was digging them out I wanted to eat them right there. Unfortunately, parsnips are not like carrots-they do not taste good raw--but they sure smell good.

I was reminded of the parsnip Buttermilk tart I made for thanksgiving. It was fabulous. and what was really cool is that it actually tasted better the next day and the day after! so if you are looking for something to make a couple days in advance and not worry about taste deterioration-this is it. And the taste is really excellent. It looks sort of like a pumpkin pie-but one taste and you are transported--knowing this is not a pumpkin pie. such a delicate flavor. absolutely lovely. I highly recommend it.
Parsnips are such a wonderful vegetable. They are terrific boiled, pureed and added to bosc pears that have been microwaved with a little butter. It's another one of those "faux" foods. It fools you into thinking it is mashed potatoes and then you take a bite and say "WOW!" this is really good! No one ever guesses what it is.

Here are the recipes for the tart and the puree:
Parsnip Buttermilk Pie
(and yes, they are a vegetable-but remember-so is pumkin! they are sweeter than pumkin)


Crust:
2 1/4 cups flour
1 tablespoon sugar
2 sticks frozen unsalted butter cut into tablespoons

1/8 teaspoon salt
¼ cup milk

Use metal blade in Food processor. Whirl flour, salt and sugar around. Add butter as fast as possible. Process until it starts to look like little peas-do not over process! Little bits of butter need to remain.

Add milk quickly and let dough come together in a ball.

Immediately roll out to fit your pie pan.

Freeze till ready to use.

Filling:
2 lb parsnips peeled and cored and cut into large chunks
1 ½ cups buttermilk
2/3 cup packed dark brown sugar
2 large eggs
½ teaspoon salt
½ teaspoon each cinnamon and ginger
¼ teaspoon nutmeg
1/8 teaspoon ground cloves

Preheat oven to 425

Bring a large pot of water to a boil, add parsnips and cook till tender-about 15 minutes. Drain the parsnips and let them steam under a kitchen towel for about 5 minutes. Return the parsnips to the pot and mash with a potato masher keeping the mixture rather rough.

Measure two cups parsnips-reserve rest for some other use (like adding to mashed potatoes).

Puree 2 cups of parsnips and the buttermilk in a blender till smooth. Transfer to a bowl and whisk in remaining ingredients until sugar dissolves.

Pour into prepared piecrust. Bake for one hour or until toothpick comes out clean. Let rest at least one hour before serving.


Parsnip and Pear Puree
3-4 lbs parsnips peeled, cut into 3” pieces
2-3 ripe Bosc pears, peeled, halved and cored
1 tablespoon butter
¾ cups milk (any type OK-skim, low fat, whole) Imaybe more or less depending on consistency-should be like mashed potatoes)
4 tablespoons butter
1/2 teaspoon salt (maybe more to taste)

Boil parsnips in saucepan on stovetop until tender-about 20 minutes.
Drain. Set aside
Place pears in a container with low sides. Dot 1 tablespoon of butter on top of the pears.
Microwave pears cut side down for about 4-6 minutes or until fork tender.
Use a food processor to mash pears and parsnips with butter. Gradually add milk till consistency is right. Add salt to taste.

If you want it a little sweeter add a couple of tablespoons of Brown sugar at the end. Process till well combined.
I hope you enjoy your parsnips as much as I am going to enjoy mine! I won't get to use them till after NY's since I'll be gone-but they store well in the garage.

Thursday, December 10, 2009

Hyphen-ventilatiing

So my roommate is an ad copy writer, which means she is super fussy about things like typos and punctuation. And if you have noticed, neither of those are really my strong suit. We were talking about the blog last night and she really got riled up that I had so many typos (well as riled up as you can get about typos). I really am trying to be better about it-but the spell checker on this blog is terrible and my internal spellchecker is inept as well.

What really bothered her was that I use a dash as a hyphen. I had no idea that - is not --. I'm so sorry if I offended anyone, but I think I will still be using - as a hyphen. It probably comes from never being in sister Mary perfect's penmanship and punctuation class. Or from being extremely lazy about such things-either excuse works for me.


From now on assume - means --. Or are you all out there still Hyperventilating over this? or should I say Hyphen --ventilating. :). (she coined that because she is extremely clever-that is why she writes ad copy and I make typos!)

You got the melting moment recipe out of me today so that's enough.
Now it's your turn to do some work and make some cookies.
Tomorrow I will start posting the recipes that I think no one will make because they are simply too much of a pain in the patooty. They are wonderful-but only someone as insane as me would make them.
Did I hear a few "oh that's me" comments from out there? :).

Recipe: Melting Moments

Marianne, I hope your still reading!! Here's the recipe you (and about 20 other people) have been waiting for.

First, let me tell you that the pictures are in reverse order-but i can't figure out how to change them so you'll just have to figure out which one I am talking about.

I tried to document all the "gotcha" steps. the only one I couldn't photograph was the one of me rolling a ball of dough. I can't snap the picture and roll the dough and no one was around to take the picture. so I Will try to describe in detail.

Melting Moments:

Dough:
Ingredients:
1 lb very cold butter cut into tablespoon pieces
11 tablespoons powdered sugar
1 ½ cups cornstarch
2 cups flour

Icing:
2 cups powdered sugar
2 tablespoons butter-melted
2 tablespoons lemon juice
2 tablespoons orange juice


Make the Icing first:
Mix all ingredients in a small bowl. Make sure the icing stays soft. If it starts to harden just put it in the microwave for a couple of seconds. It should be smooth and stir able. I make 1 1/2 icing recipes. you will have some leftover-but you will not run out. people like lots of icing on the cookies. don't be stingy with it.

For the cookie:
Preheat oven to 350 degrees
Put Butter first then rest of ingredients in food processor with the metal blade. Process for about 1 minute till it forms a ball. The dough must form a ball or your cookie will be a crumbly mess. (see picture of food processor bowl with MM dough that has formed a ball-this is what form a ball means-there is no loose dough or crumbly parts. the dough is all a solid mass). IF you have to open the food processor and push the crumbly parts back in to the bowl that's OK-just do this and then continue to process. Don't just let the blade spin and spin. this will cause the butter to melt and make a mess of your cookie.

If dough is firm enough-roll the dough into ½” balls and place on cookie sheet
1 ½“ apart (see picture of balls and spacing on cookie sheet). When rolling the balls, try to get a feel for how much dough you need to pinch off to get the ball size you want. try to make all balls the same size (both for cooking evenness and for best presentation). You want to handle the dough minimally so if you get the amount right that you are rolling then you won't need to add dough or pinch some off to get the ball size right. this will eliminate some excess handling of the ball. the reason you can't handle it too much is because it is made of mostly butter and the heat of your hands melts the butter creating a cookie that will bleed out on the edges when cooking. SO take a small amount of dough in your hand and roll it with very little pressure in between the palms of your hands. Don't mush the dough-just a gentle roll-pass it on the palm of your hands a couple of times. it should be pretty close to round and the dough should hang together.

I would highly suggest putting the dough in the refrigerator before you roll it because the harder it is when you start-the less likely it will be to get soft in your hands when you are rolling-so until you get to be an expert at rolling-make sure the dough is hard when you start to roll.

After you have rolled a full cookie sheet, take a flat bottomed glass and lightly dip it in a bowl of cool water. Take the glass and press it lightly on the rolled cookie ball to flatten it into a disk that is about 1/8” thick. (see photo of technique and other photo or thickness desired).

Continue with all dough. If the dough becomes too soft, place it in the refrigerator. It may get very hard in there and you may have to leave it out to soften back up till it is roll able. DO not place it in the microwave to get it soft. Just let it sit at room temp for ten minutes or so.

Watch these cookies as they overcook very quickly. They will be ready in about 12 minutes but they won’t look done. The only way to tell is to lightly use a spatula to lift one of them to see if they are just beginning to brown on the bottom. (see photo of finished MM) As soon as they do this they are ready. What you don't want is browning on the edges. this may happen VERY slightly with a couple of the cookies-and that is OK. but really try to look at them very closely and get them before they start to have any hint of tan at the edges. the cookie will have a done look to the top-white -but the texture will look done. watch them as they cook-you will see what I mean.

Take them out of the oven and remove them to a cookie rack for about three minutes. Start icing while they are still warm. Place a small dollop of icing on each cookie and spread it around. After icing, immediately place them on a cookie rack to cool. Be very careful with them-they are very delicate cookies until they cool.

Make sure they are fully cooled before you stack them. they will stick together if they are not totally cooled. I put them in the fridge or garage to set. But don't leave them in there because they are mostly butter and will harden too much and taste lardy. keep them at room temperature.


SO that is it-the famous Melting Moment cookie. Get Baking! and tell me how they turn out! if you can't post on the blog-send me an email at
ciao!


Wednesday, December 9, 2009

More melting moment moments

Made Melting Moments for the Garden Club Christmas party. They were a hit. I'm so glad. Such cute little things - the cookies-of course the ladies are pretty cute too. :). I saw a few get tucked into napkins for snacking later. Always a good sign. I saved a few for Doris since her box didn't have any.

Even though she STILL hasn't said thank you for the rest of the box! MM that is all she thought about. Guess I can reward such loyalty with a little package of the tasty morsels.
let's see if I get a thank you...I'll keep you posted.

I'll be posting that MM recipe either tomorrow or Saturday. Depending on how exhausted I am at the end of the day. Can't even believe people are working so much this late in the year-don't they know you're supposed to be slacking off now?? MEMO!! It's the holidays. Oh well-guess I'll just earn my paycheck...reluctantly...

By the way, I'll be going to Vail next week and then to my mom's for Christmas. Hang in there on the blog. when I get to mom's it will be a food fest. She'll probably make me make the Buche de Noel again...I hate making that thing-takes all day. But for her-Christmas is not Christmas without it. so I do it...The french-making something complicated even more complicated at a time of year when everything is complicated anyway.

And I can't get off the blog tonight without commenting on my good friend Tiger Woods. What a nightmare! That guy was really a jerk all this time and no one knew. His poor wife. Imagine seeing the neighbors after all this. It's kind of scary though- here everyone thought he was such a family man. You wonder why none of these women ever said anything to the tabloids before this. Imagine what we DON'T know about others.

So glad his wife took off for Sweden. What's funny is I bet she is still a Swedish citizen so he is going to have a tough time fighting for visitation rights.

And speaking of smart women-yeah for Martha Coakley. It's about time.

Ok-enough "womanizing" for the night. I am stuffed from too much food at the garden club party. I have to nibble everything - I consider it professional research of course....

I was on the phone with a client this afternoon and I announced to him that speaking to him was making me hungry so I would be eating a piece of dark chocolate with Hazelnuts while we spoke. I happily munched in his ear-no complaints. I love being old. I can get away with anything! Just like my 18 year old cat-I don't mess with him and no one is messing with me. Age has its privileges.

By the way, if you buy those bagged lettuces-the butter lettuce is the best-they have them at trader Joe's for $1.99. that is an amazing price. even Costco and BJ's are $2.39. It is their regular price too-not a sale price.

Tuesday, December 8, 2009

Lemon Glazed Candied GInger Cookies


These little morsels pack a lot of flavor. The Ginger is just the right balance for the sweet.
As with all the cookies-I make these very small. You really shouldn't make any of your cookies more than one or two bites (at most). This allows the taster to truly take in the whole cookie and savor the little bite.
This is a relatively simple recipe. I buy the candied ginger at TJ maxx or Tuesday Morning when I see it. There is a product called The Ginger People that is quite good. But I have not been disappointed with any of them. it is quite expensive in specialty or grocery store (if you can find it) so worth buying when you see it at a discount store. I have trouble not eating it all before the holidays as it is really yummy to munch on. So buy a few cans when you see them. It lasts forever. It's that hot on the tongue yet sweet taste that keeps you wanting more. The cookie doesn't have the hot taste-but the ginger is a different taste than the sweet and balances it along with the lemon.

(made myself hungry for some of that Ginger. Thank goodness I have some in the pantry!)
I took a picture of the can the ginger pieces come in. Also in the picture are some slices I got at Mac's on Woodstock, VT (although they are almost gone as you can see). Don't buy the slices for the cookies or you'll be chopping ginger for an hour and it can get sticky. But the slices are great for snacking and taste sublime in melted dark chocolate! My tongue and throat are tingling right now but my mouth tastes sweet. Very nice...

Ok, on to the recipe:
makes 8-10 doz small cookies
Lemon glazed candied Ginger Cookies:
Cookie:
2 cups flour
1/2 teaspoon baking powder
3/4 teaspoon salt
3/4 cup unsalted butter (1 1/2 sticks)-softened
1 cup firmly packed brown sugar
1/2 cup finely chopped candied ginger
1 large egg
2 tablespoons vanilla extract
Glaze:
4 cups confectioner's sugar
2 tablespoons finely grated lemon zest*
2 teaspoons honey
1/3 cup water
For the cookie:
Sift flour, baking powder and salt in to a bowl. Cream butter and brown sugar on medium until pale and fluffy (this takes a few minutes-be patient. it will become lighter in color and texture).
about 3 minutes.
Add ginger pieces. Beat for 2 more minutes. Beat in egg and vanilla until well combined. Add flour mixture slowly while mixer is on lowest setting. Then beat on medium low just until dough comes together.
Shape dough into two 1 inch thick disks and wrap tightly in plastic wrap. Refrigerate for at least one hour (You can do this up to three days in advance).
Preheat oven to 350.
Roll out one disk at a time on lightly floured surface. I use silpat for this so I avoid flour and can reuse the scraps. This is the way I get 8-10 dozen cookies. If you don't use the silpat, you will only be able to use the scraps once. And you really need to be diligent about not using much flour to roll them out otherwise you will have tough cookies. For a tender cookie-buy a piece of silpat. you will use it over and over again. It is basically permanent parchment paper. Just make sure not to cut on it-that will ruin it. I took a picture of mine. They come in all different sizes. This one is quite large. I have several. Get the size you think you will use the most (ie., what size pan you bake in the most). If you are using silpat do not use flour to roll out the cookies. They will not stick to the silpat while rolling out.
Roll out the dough to 1/4" thickness or a little thinner. Use a cookie cutter to cut out circles or whatever shape you want. I use a circle that has little petals all around. Whatever shape-try to make it 1 or 1 1/4" in diameter. When you are through getting as many as you can out of the original roll (place them on a parchment lined cookie baking sheet) pick up the scraps, re-roll and cut out more cookies. IF you are using silpat, continue doing this until you have no more scraps. if you are using flour you must stop after the first re roll.
Refrigerate the baking sheet full of cookies for about 10 minutes (since I make these in the winter-I put them in the garage for ten minutes. easier than trying to find room in the fridge for a cookie sheet)
Bake them in the 350 oven - rotating the pan halfway through baking. Bake them for about 12 -14 minutes or until the edges are just a very light golden. Transfer the parchment with the cookies to a wire rack. let cool completely. repeat until all cookies are cut and baked..
Glaze:
Whisk all ingredients together and add a pinch of salt. Mix until smooth. Spread over cookies. Let stand till glaze is set-about 20 minutes (you can make this happen faster if you put them back out in the garage. they will set mush faster in a cold room). Be careful that they are set before you pack them in a box or Ziploc bag. They will stick together if they did not set.
*the best way to grate zest (orange, lemon, lime, etc.,) is with a microplaner. I am using one in the photo. takes seconds to grate zest and it is very fine and has no white pith. This tool is very inexpensive (about $7) and can be used for fresh spices such as nutmeg as well. Very handy tool.

Monday, December 7, 2009

Theory Tested

SO I just ate an oz of semi sweet chocolate and an orange roll for dinner. Definitely a sweets overload! need salad-NOW! Won't be eating sweets for a while.....

The theory prevails. Too much of one thing and you want something else to balance it. Good or bad-its a balance. Although-bread is probably good anytime. :). Especially bread with Cheese and butter (yes cheese AND butter-trust me on this one).

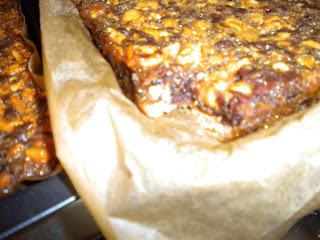
Recipe: Gooey Chocolate Cashew bars


These are easy-just make sure to use the same tip as on the other shortbread cookies-use the offset spatula to press the shortbread (see picture above).
Crust:
1 1/2 cups flour
1/2 cup unsalted butter softened
1/4 cup firmly packed brown sugar
1/4 teaspoon salt
Topping
1 1/2 cups slated cashew pieces
1 1/2 cups semi sweet chocolate*
3/4 cup sugar
3/4 cup DARK corn syrup
3 eggs lightly beaten
3 tablespoons unsalted butter-melted
2 teaspoons vanilla
pinch of salt
pre heat oven to 350.
Combine all crust ingredients and beat on low speed until mixture resembles coarse cornmeal.
Press mixture into ungreased 13x9 inch baking pan (I line the pan with parchment paper so when the bars are done you can lift the whole sheet out and cut them on a cutting board. this spares your pan and is way easier than cutting in the pan).
bake for 15 minutes or until edges are slightly browned.
Meanwhile stir together the topping ingredients. mix well. spread over hot partially baked crust. Continue baking for 28-33 minutes. do not over bake! they may be a little jiggly-not to worry.
cool completely and cut into bars.
If you used parchment paper-which I totally recommend (see picture above)-once they are cool, lift the whole slab out of the pan and cut on a cutting board. I rip the parchment paper off before cutting. just gently lift one of the slab corners and peel back underneath-the whole sheet will peel right off as you pull it underneath the slab.
*I use good quality semisweet chocolate. Callibut or Scharffen or even Ghiradhelli. I don't think the tollhouse morsels are as good-but if that is all you have then use them...


Pictures

If you'd like to see all the pictures in one spot go to:

http://picasaweb.google.com/definitelyDiva/DefinitelyDIvaS?authkey=Gv1sRgCOCSp6Gfm8CzUw#

What Tiger Woods Can Teach Us About Food Cravings


So unless you live under a rock-you have no doubt heard that tiger woods is a sex fiend and despite having a totally knockout gorgeous wife- he strayed. So what does this say about us as a specie? it says we like variety!

It's the same with food. Even if you could eat chocolate mouse cake all day long-eventually (probably really soon actually) you would bore of chocolate mouse cake and maybe even crave a Brussels sprout or two! (imagine that). Or in Tiger Woods' case, I guess he craved a tart or two-hahahaha)

So I like a lot of variety in my diet-that really does seem to keep me from having cravings. I enclosed a shot of my pantry. Its chock full of what i call "cute food". things that you can use to enhance a meal quickly - like white truffle oil or horseradish or ponzu etc., and about 15 pounds of dark chocolate. Let's face it-you can never have too much dark chocolate.

Now I must say-I do eat more than anyone I know so I can't say this is a great recipe for weight loss-but it does keep me happy! and I have come to realize that this is more important than being stick thin. Also, I can't imagine eating 1000 calories a day for the rest of my life-so why even do it for a minute???


Of course that variety includes tons of veggies-because I love all vegetables (except eggplant.) But really-why can't I -or anyone else for that matter- have a nice piece of dark chocolate for dinner???

I vow to never try to be a size 2. 6 maybe-but not 2. :). See size 6 is that illusive ten lbs away that we all think we can lose-it traps us all-I think it's marketing-if you could just lose that last 10 lbs you'd be the happiest person in the world.. Really-does anyone but us care??? probably not. So I think I'll go have another piece of dark chocolate with hazelnuts.....And tell the Jenny Craig rep to buzz off.

Oh, and one more thought on good old Tiger - how happy can his wife be staying so thin? I don't know about you-but not getting to eat what i want makes me cranky! so if you can't keep your man from straying by being thin (as we see ala Ms Tiger woods) then maybe being HAPPY would be a better idea! Just a thought...

Bon Appetite!

Butter and eggs-the why and how

You probably noticed that the recipes posted here ALL call for unsalted butter. In fact, everything should be made with unsalted butter. Even if the recipe does not call for it-you should substitute unsalted butter and add a pinch of your own salt. WHY??? you ask?

For two reasons:
1) Salted butter contains water. Not much, but enough that it becomes part of an equation that you don't want it to be a part of.
2) Salted butters contain varying amounts of salt so you can never control the amount of salt in a recipe with salted butter.

But mostly, unsalted butter will give your baked goods a much more buttery taste-it has a more sophisticated taste that is not masked with the salt.

Always remember to add salt to the recipe when you are using unsalted butter in a recipe that called for salted. Salt is a flavor enhancer and the other flavors will not be as bright with the reduction in salt. So add it back! A pinch for every bar.

In my house, salted butter is not allowed through the front door. There is no reason for it as far as I can see. One of those useless things in life.

Eggs:
Eggs are all about temperature. If you are making a cake, take the eggs out of the fridge at least an hour before you start. this gives the eggs time to come to room temperature. At room temperature an egg will "rise" more. Eggs rise in volume when you beat them. they can be used to leaven a cake without any additional leavening (like baking powder or Baking soda). If you beat them on high speed for about an hour over a steaming bowl of water, they will triple or quadruple in volume creating all the volume you need for a cake.

No matter-all eggs should be at room temperature for best baking experience.

Now-egg whites also benefit from room temperature-but they must not have a drop of fat. so if you are separating eggs-be very careful to make sure no yolk gets in the white.

WHen cooking with eggs - such as sauces or ice creams- you are asked to add a little of a hot ingredient (usually milk that has boiled) to the beaten egg. this "tempers" the egg so it is getting warmer slowly. if you were to add all the hot liquid at once you would scramble the egg. so the egg gets tempered, then you add the tempered egg back in to the hot liquid and you cook it again to form a custard. This requres skill and patience. you should stir the entire time and as it starts to feel thicker-its done. But over cook it and you will have scrambled eggs again. Be very careful with eggs and temperature.

On a side note, whipping cream is the opposite. In order to get it to whip to its fullest, have the cream, the bowl, and even the beaters very cold-this will ensure a very light and firm whip.

That is the food lesson for the evening!
innerdd@hotmail.com

Sunday, December 6, 2009

Honey Orange Cookies-recipe

The Honey orange one is all the way in the lower right hand corner. These cookies are extremely easy to make and are really quite special. The trick is in how you bake them. These are my third favorite. They are addictively soft and slightly spicy.


The only thing you have to know is that there is a lot of baking powder in this recipe so they get big. I prefer them kind of flat and chewy. The way to do that is to make them smaller than the original recipe calls for and under cook them a bit. Or so it seems. they are actually quite cooked-but seem pale till they sit out. These cookies are very strange in that as they sit they get darker! so take them out when they are palish-starting to turn brown on the bottom.
Also, there is NO substitute for the orange extract. You need a very strong shot of orange without adding too much liquid. but I do add about a tablespoon of orange juice as well (that isn't in the recipe-but i think it adds to the flat chewiness that I prefer).


Cookie:
2 cups flour
3/4 cup sugar
3/4 cup unsalted butter
1/4 cup honey
1 egg
1/2 teaspoon baking soda and nutmeg
3/4 teaspoon salt
1/4 teaspoon ground cloves
1/2 teaspoon orange extract


Glaze:
1 cup confectioner's sugar
2 tablespoons milk
1 tablespoon (or more if you wish) grated orange peel


Preheat oven to 375
In a mixing bowl combine all cookie ingredients. beat at low speed, scraping sides of bowl often, until well mixed (about 2 min}.
Drop dough by rounded teaspoonfuls onto an ungreased cookie sheet. bake for 7 or 8 minutes (this is the amount of time I bake them-you may cook them up to 10 minutes)-until edges are lightly browned.
Meanwhile in small bowl combine glazing ingredients. Use a butter knife to carefully smooth the icing over the top of each warm cookie.
Makes about 5 dozen

Friday, December 4, 2009

ungrateful recipient

So I sent Doris an email asking her if she got the cookies. Did I get a "yes, thank you so much!" or a "yes, they are wonderful", or some other grateful comment???!! NO of course not, after years of getting Melting Moments the only question on her mind was
"where are the lemon (MM) cookies?" :).

Now I'm sure she meant all those nice things I mentioned above-but she was just overcome with disappointment at the lack of melting moments. We've all been there-that gift we got is nice, but it jsut isn't what we were expecting. "the scarf is lovely, but I was expecting a diamond pendant dear". You know the feeling...

Of course I can't believe i didn't put any in her box. I thought there were plenty in every box as I made close to 500 of them this year!

Doris-I apologize for the transgression. I know they are every one's favorite....Alas-you got a bum box. I was getting delusional towards the end. Which is precisely why I am further whittling the number of offerings next year. But MM are the number one pick-so they stay.

Strawberry Marzipan Bars


This recipe calls for strawberry preserves-but I use raspberry. Actually this year I used some of my good friend Ellen's home made Plum/fig as well-boy was that yummy!!! but you can use whatever you want. Just be aware that this has an almond marzipan taste so make sure it goes with that.
This recipe was in a book on "best of" cookies from the 80's. The proportions were right-but the directions were inadequate. I worked at this cookie for about four years before I got it right Four seasons of making it just at christmas that is-my cookies are like the turkey at thanksgiving. For some reason I only make them at christmas!


OK the recipe:
Strawberry Marzipan Bars
Preheat oven to 350
grease and flour 9" sq baking pan


Crumb Mixture
1 1/2 cups flour
1/3 cup firmly packed brown sugar
1/2 cup unsalted butter
1/8 teaspoon salt
Filling:
3/4 cup flour
1/2 firmly packed brown sugar
1/4 cup unsalted butter
1/4 teaspoon salt
1/2 teaspoon almond extract


3/4 cup raspberry preserves (or other flavor that you would like)


Glaze:
3/4 cup confectioner's sugar
1 tablespoon milk
1 teaspoon almond extract

Combine all crumb ingredients in mixer. beat on low till combined and crumbly.(1-2 min)
Press into pan, Bake about 15 minutes till slightly browned.
Meanwhile, combine all filling ingredients EXCEPT preserves and beat on low spread until well mixed. (1-2 min).
Spread preserves onto cooked hot crust.
Sprinkle filling over preserves.
Return to oven and bake 20-25 min or until edges are slightly browned.
Mix glaze ingredients until smooth.
Cool bars completely. Drizzle glaze over bars. Cut into desired sizes.

OK-what could be simpler right? well .....

TIPS AND TRICKS:


If you make this according to the directions, your shortbread will crumble and your filling will be soggy and the glaze won't stick. Great recipe huh?
same ingredients-just a few hints and pictures.
First, decide if you want to just make a 9x9 pan of this. remember the mathematics of cookie making? I usually make this in a 17 x 10 pan so- 81inches versus 170 inches means I double the recipe. Your choice-but these go FAST! And its the same work to make twice as much. you be the judge.
Directions are the same for double or single recipe.
When you make the base, the only way to get this really pressed in so it doesn't crumble all over the place when you cut them is to really press. and the best method I have found for this is an offset spatula.
Check out the picture at the top. Without the spatula you see it is not completely smooth. But after using the spatula it is very smooth. You will see the differnce. The other picture is showing you how to use the offset spatula. It should be pressed down on every part of the pan.
Press the entire pan with the spatula. really push down to press the dough. this will pack it well and ensure that it stays together when you cut the bars.
OK-now you have the bottom part ready (after you bake it of course)for the preserves. Spread the preserves all over. Then when you put the filling on-press down. This time not with the spatula-but with your hands. don't just sprinkle the crumb mixture-press it onto the jam. It won't mess up the jam and it will keep the shortbread from getting soggy with the jam-it will be part of the filling. Still three distinct layers-but the topping is now flat and smooth over the preserves-not sprinkled.
Now-for the frosting. Really wait till it cools. This was counter intuitive for me. I thought it should be warm to stay on-but that doesn't work. The cookie must be cold.
And don't drizzle the frosting. actually glaze the top of the cookie completely with the frosting.
When you are making the frosting you may have a tendency to want to add more milk-don't do it. the frosting texture will come out perfect with these proportions. just keep mixing.
that's it-your strawberry marzipan bars will come out perfect if you follow these instructions!
They were the number two cookie behind the melting moments...well worth making.
ENJOY! and tell me how they came out!
If you have any questions or comments you can send them to Innerdd@hotmail.com if you are having trouble posting.